How to add comments to your personal webpage with Commento++ and Heroku
Introduction
In my main website (vinizinho.net), I have been using Disqus to manage my comments for quite some time now, and I'd never had any problems. Why did I choose Disqus? Basically, because it was easy to set up, popular, and most important of all, free. However, I was never quite satisfied with it, since the comment section looked kinda ugly and sometimes took a few seconds to load. If I had to describe Disqus in a single word, it would be bloated, which is the exact opposite of the vibes I wanted to give off with my site (i.e. smol, clean, naïve). But it mainly worked, so I kept procrastinating on any changes.
The real straw that broke the camels back was when I accidentally saw how it looked like with the Adblock off.
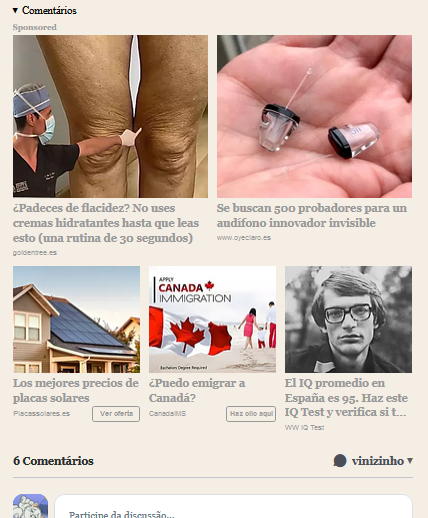
Holy shit. It looks exactly like one of those shitty phishing AI generated websites that you click on when you momentarily forget that now we need to ignore the first 5 results of any Google search! Have people always seen this when entering comment sections on my website? Absolutely revolting.
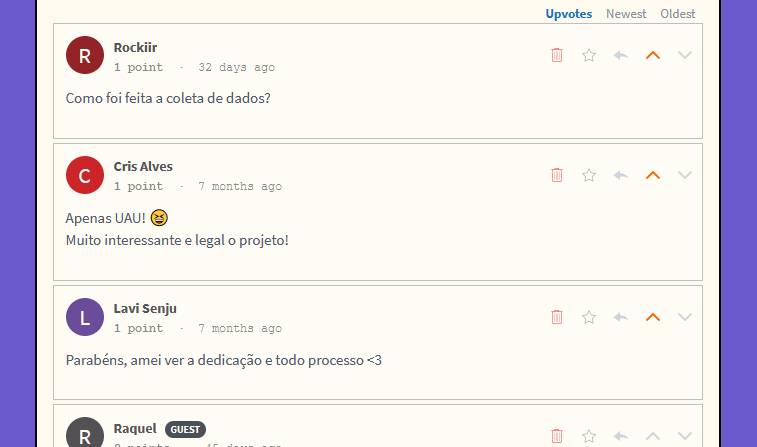
So I looked at the alternatives, and ended up setting on Commento. It's faster, more customizable, and doesn't put shitty ads on my website. The downsides? Well, its online service costs $10/month, which I could pay without going hungry, but since it also allows self-hosting, that's what I ended up doing. In fact, I used the Commento++ fork, since it has more features than the official Commento repo (which hasn't been updated in the last 2~3 years).
I've used Heroku and Sendgrid to deploy Commento++. So far, the cost has been $0/month, since my website is a personal one and therefore doesn't have much traffic. Although setting it up wasn't hard, I'll leave my breadcrumb trail here if anyone wants to follow it.
Step 1. Create a Heroku account
Go to Heroku and create your account. Get the free account.
Step 2. Deploy Commento++ on Heroku
Go to the Commento++ repo and click on the "Deploy to Heroku" button.
You'll see a "Create new app" page with several required input fields. The ones you need to pay attention are:
- App name: nobody will see this except you. Put whatever you want (I used "mycommento")
- Config vars: configurations specific to Commento++. Each comes with a nicely-written description that I would suggest you to read.
COMMENTO_ENABLE_LOGGING: leave it as 'false'COMMENTO_ENABLE_WILDCARDS: leave it as 'true'COMMENTO_FORBID_NEW_OWNERS: leave this as 'false' for now, but REMEMBER IT! We'll be coming back to this in a moment.COMMENTO_ORIGIN: fill it with something likehttp://commento.example.com:8080for now.- If there are any other ones, leave them as is.
Click on "Deploy app" and wait.
Step 3. Fill COMMENTO_ORIGIN
Now that your Heroku app has been created, it's time to set up its endpoint. In the App page of your Heroku Dashboard, go to Settings > Domains and find its URL. It will look something like this:
https://your-app-name-XXXXXXXXXXX.herokuapp.com/
This is the URL of the App you deployed. We need to configure Commento++ with it (you couldn't do this before because the app had not been created!). Go to Settings > Config Vars, click on "Reveal Config Vars", and edit COMMENTO_ORIGIN to replace http://commento.example.com:8080 with the App URL above.
To apply your changes, click on the More button on the App page (to the right of Open app), and select "Restart all dynos". This should take a few seconds.
Step 4. Create your account
Now, go to the following URL and create an account:
https://your-app-name-XXXXXXXXXXX.herokuapp.com/login
Next, click in "New domain" and add the domain where you'll be embedding Commento (in my case, vinizinho.net). Now you'll be able to access the Commento++ dashboard, where all the admin stuff is done, like importing comments from Disqus (if you have any), changing settings, moderating comments, etc.
Step 5. Closing off account registration
When creating your account at the previous step, notice that there wasn't any validation: anyone that creates an account can get inside the admin dashboard! This is a big security problem. If you don't want anyone else to have admin privileges just by accessing the URL, the key is to turn account registration off.
To do this, simply go to the Settings > Config Vars in your App dashboard, and change COMMENTO_FORBID_NEW_OWNERS to 'true'. Now nobody else will be able to create an account!
Step 6. Embedding Commento++ in your website
Finally, everything's set up. If you want to add a comment section to your website, go to your Commento++ Admin dashboard (https://your-app-name-XXXXXXXXXXX.herokuapp.com/dashboard), click on "Installation Guide", and copy the HTML code. It should look like this:
<script defer src="https://your-app-name-XXXXXXXXXXX.herokuapp.com/js/commento.js"></script>
<div id="commento"></div>
Just add it to your website and you're ready to go!
Bonus: adding e-mail notifications
A key Commento feature is that it notifies you when you get any new comments. To set this up, you need a SMTP server of some kind -- I'm using Sendgrid, which is free if you send less than 100 mails/day. I'll walk you through it.
Step 1. Create a Sendgrid account.
Go to Sendgrid and create your Free account.
Step 2. Set up your sender
Sengrid will ask you to provide a single sender's details (address, sender email, etc) so it can comply with the law. Enter a valid e-mail and confirm your registration.
Step 3. Get the Sendgrid data
Now, go to Email API > Integration Guide on the Sendgrid page, and select "SMTP Relay". Create an API Key with whatever name you prefer, and take note of the application data (Server, Ports, Username and Password). Click "Verify Integration" and finish it.
Step 4. Set up SMTP info in Commento++
It's time to input these SMTP data in Commento. In the Heroku App page, go to Settings > Config Vars, and add/edit the following keys:
COMMENTO_SMTP_HOST: smtp.sendgrid.net
COMMENTO_SMTP_PORT: 587
COMMENTO_SMTP_USERNAME: apikey
COMMENTO_SMTP_PASSWORD: <your API key>
COMMENTO_SMTP_FROM_ADDRESS: <your sender email>
COMMENTO_SMTP_SKIP_HOST_VERIFY: false
Now restart your server in More > Restart all dynos. Now e-mail should be working!
Note: by default, Commento++ does not send you a notification every time a new comment is made. To set it up like that, go to your Commento dashboard, access "Moderation settings", and click on the "Email schedule" that you'd like. Don't forget to click on "Save changes"!
Bonus: Bonus: changing Commento style
If you want to change the CSS on your Commento++ section (and why wouldn't you?), simply create a .CSS file and provide it like this:
<script defer src="https://your-app-name-XXXXXXXXXXX.herokuapp.com/js/commento.js" data-css-override="commento.css" data-auto-init="true"></script>
<div id="commento"></div>
No more ads, no more bloat, and way more style. What else is there in life?